Online editing
GitHub is an online database of git repositories. These can be thought of as folders where every file or folder contains a history of every change ever made to it. The walkthrough below will describe how you can make changes to the BES-QSIG docs repository. It covers three GitHub concepts:
- Forking
- Editing online with GitHub
- Pull requests
Forking
To prevent spamming, the master copy of the docs repository is protected from anyone making changes to it. In order for you to make changes or add new files it must first be copied to your own GitHub account, this is called forking in GitHub terminology.
To make a copy go to the docs repository url (https://github.com/BES-QSIG/docs) and click fork.
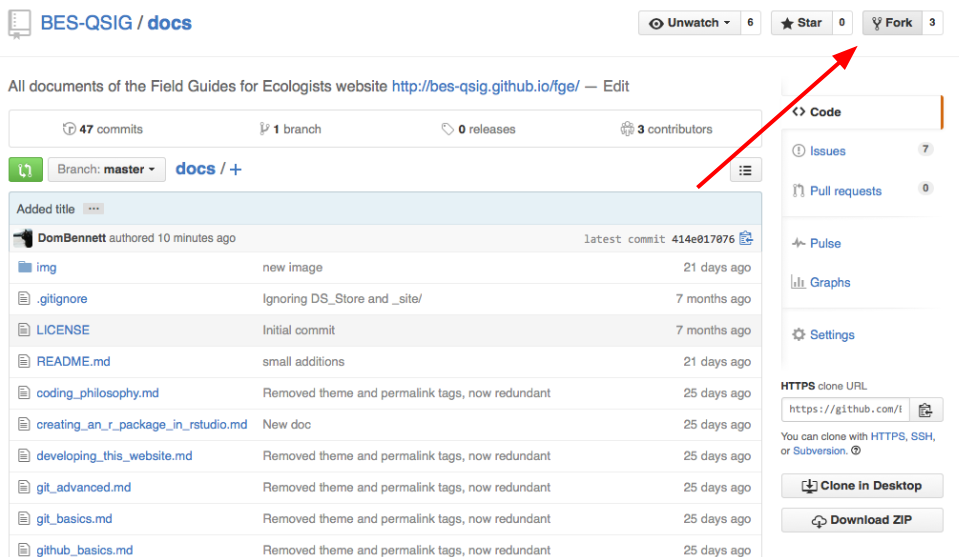
You will now find a copy of the repository in your own GitHub account (Profile --> Repositories).
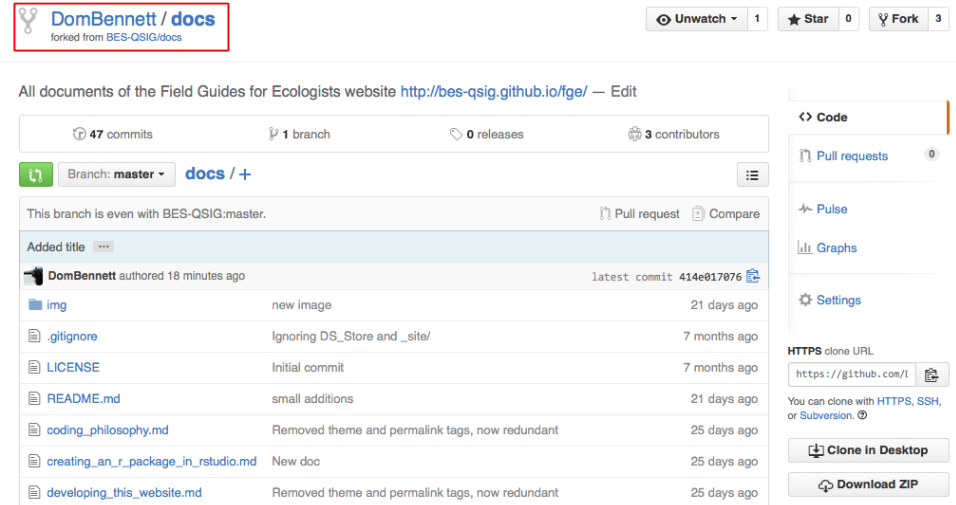
This is your copy and you can make any changes you want.
Making changes
Selecting one of the documents (e.g. how to contribute) you can make changes to a file directly using GitHub's edit button.

This will open a text editor where you can modify the Markdown script. In this example I have added a new title and some text.
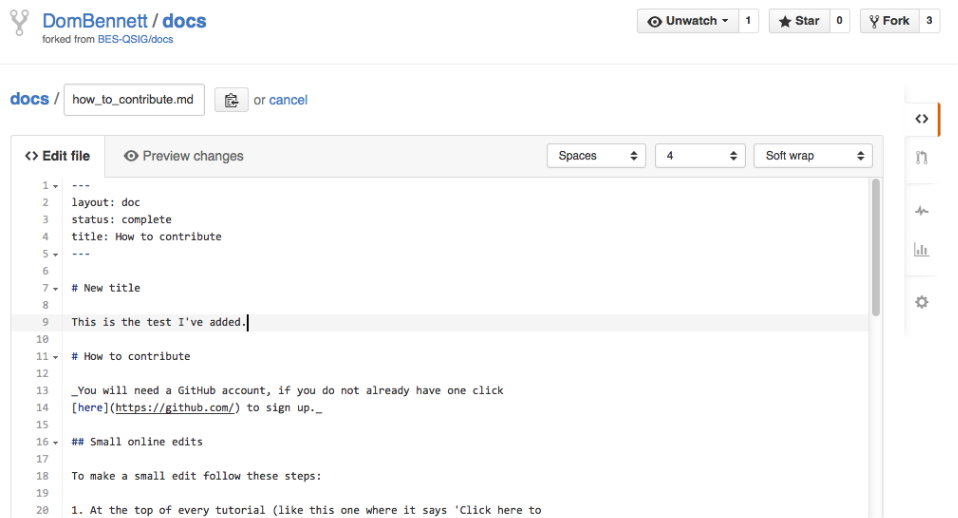
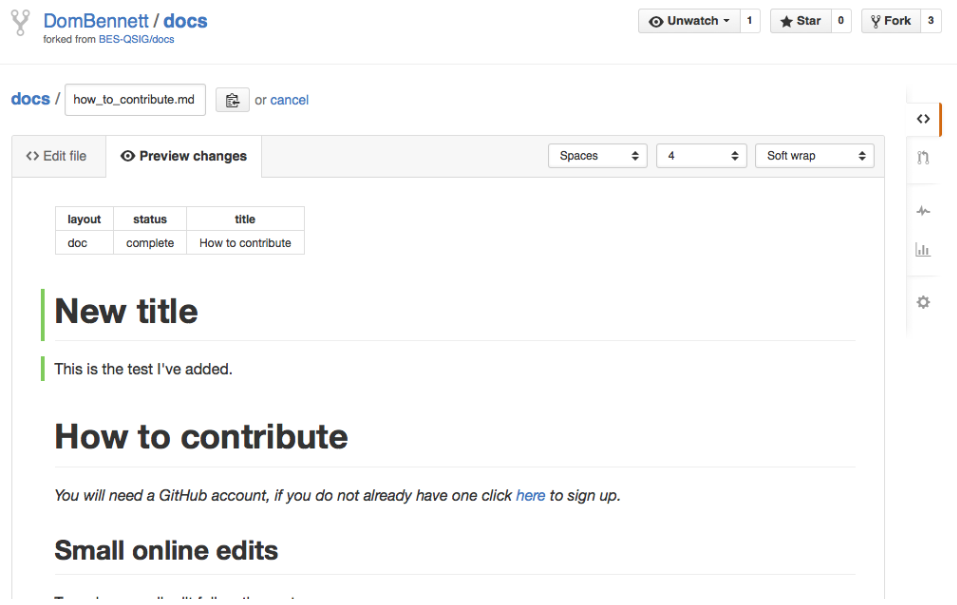
We can preview how the Markdown script will be parsed by clicking the preview changes. Handily, GitHub has highlighted where the additions have occurred with green lines.
GitHub requires any changes made to a file to be 'committed'. This will update the file with the change you have made and it will record the file's state before the change. All commits made must have a message describing the changes. In this example, our message is 'added new title' and the additional information is 'I've added a new title and new text.' We will commit these changes directly to our copy of the docs repo (termed here as the 'master branch'). (Selecting 'Create a new branch for this commit and start a pull request' would skip the pull request section below.)

Adding new files
To create a new file (text based files only) click the + symbol.
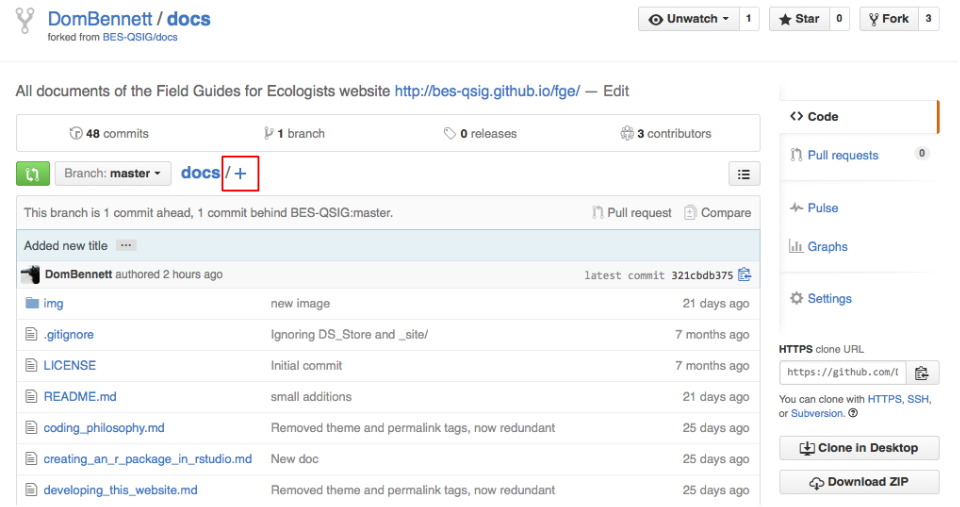
This will take you to a new editing screen where you write your markdown and preview as before.
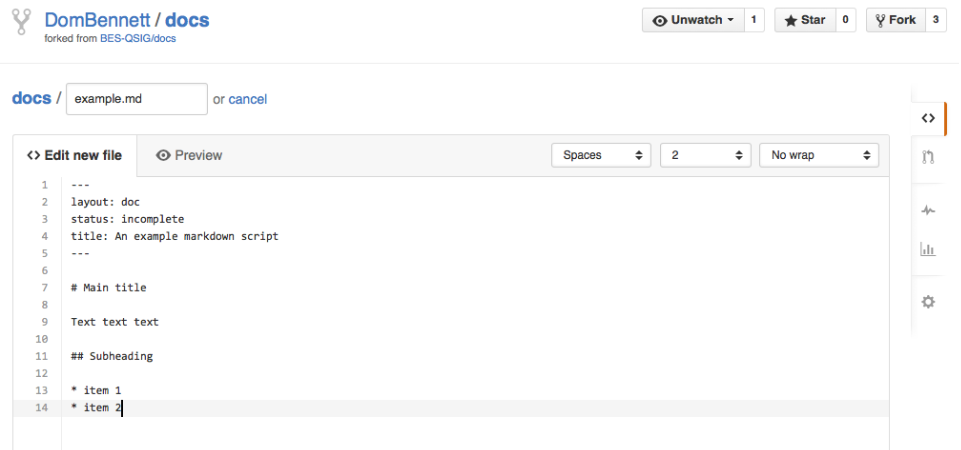
Please make sure you use the .md file extension and include front matter as described above.
Creating a pull request
Navigating to the main page of your copy of the docs repository will show how many commits ahead your copy of the repository (called a branch) is compared to the original. In this example, it is 1 commit ahead of the BES-QSIG:master. You can have as many commits as you wish, including changes and new files.
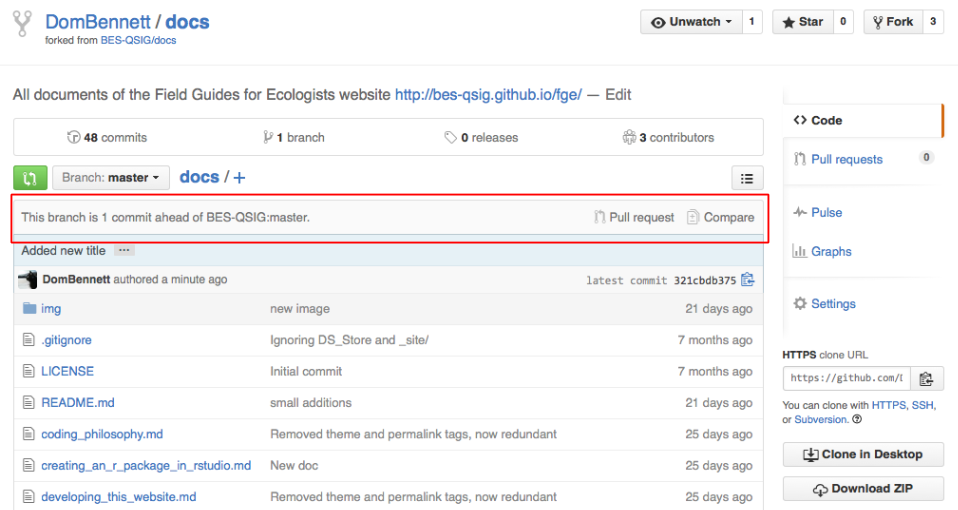
Clicking on compare will show us how our branch and the BES-QSIG:master branch differ. Additions are marked in green and deletions are marked in red. In this example, the two branches can be readily merged allowing us to perform a 'pull request'.
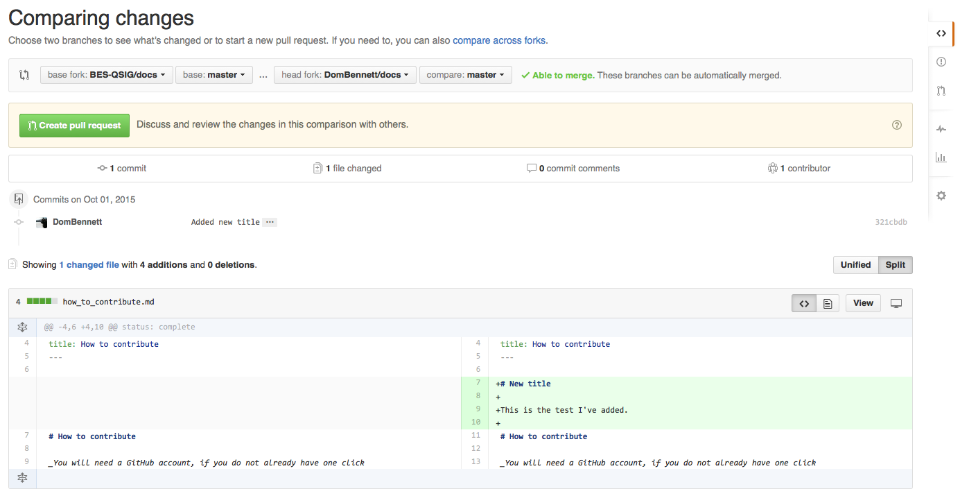
A 'pull request' is used to merge two branches, "please could you pull my branch into your branch". If we click on 'pull request' GitHub will invite us to describe the changes we have made by showing us a similar screen to what we see when we make commits. In this case it is just one commit, but it could be many.
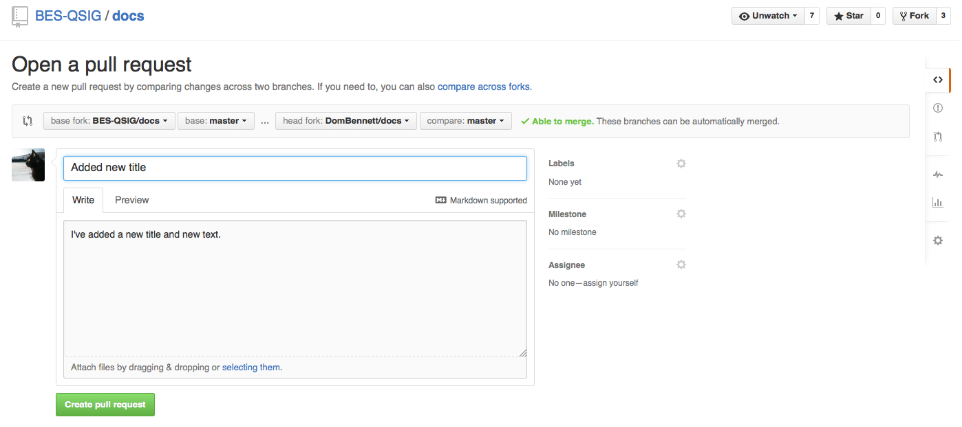
Clicking 'create pull request' will inform the maintainers of the docs repository that someone wishes to make a change. This is done by creating a page where maintainers can view your changes and discuss them with you.
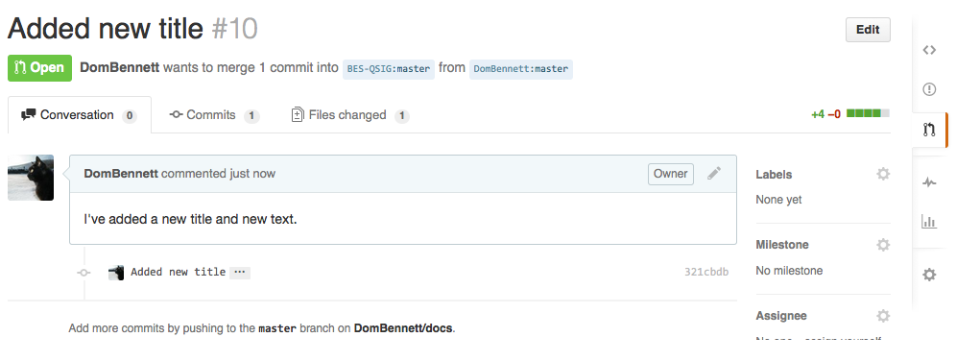
If the maintainer is happy with the changes in your branch, they will merge your branch and the original and your changes will be incorporated into the FGE website within a few days.